Art plays a pretty pivotal role in early childhood education. Hand drawing helps young learners develop fine motor skills, creativity, and confidence. Teachers and art educators can use simple but effective drawing lessons to engage students and build foundational artistic skills. This guide offers hand drawing lesson ideas, creative prompts, and essential teaching strategies to inspire your young artists in the classroom.
Why hand drawing matters in early learning
Hand drawing strengthens hand-eye coordination, spatial awareness, and problem-solving abilities. When children draw, they learn to translate ideas onto paper, improving their ability to express thoughts visually. These activities also build patience and concentration, two essential skills for academic success.
In particular, drawing hands supports your students in:
Their expressive potential
Understanding anatomical complexities
Recognizing gestures and movements
Capturing hands accurately in drawings is essential for any artist. However, despite their familiarity, hands are notoriously difficult to draw and can be even harder to teach. Many novice artists struggle with:
Getting the thickness of fingers right
Proportioning the length of the hand and fingers correctly
Ensuring all fingers fit naturally on the hand
Avoiding stiff, unnatural poses
Seamlessly connecting the hand to the arm
Fortunately, these hand drawing challenges can be overcome with a few simple techniques, fun exercises. And as the famous Zig Ziglar quote goes, “You don’t have to be great to start, but you have to start to be great.”
Getting started with your little artists: 5 essential art supplies
You don’t have to have a vast arsenal of expensive art supplies to introduce your beginner artists to the basics of hand drawing. Start with these art classroom supplies that make sense in any modern early learning classroom.
Thick, easy-to-hold pencils and crayons
Ideal for small hands developing grip strength, thick pencils and crayons help early learners build fine motor skills and hand-eye coordination. These tools encourage a natural, comfortable grip, making it easier for young artists to experiment with lines, shapes, and colors. With durable construction, they withstand enthusiastic use while providing a satisfying, smooth application of color.
Washable markers
Reduce mess while allowing bright, bold lines, washable markers are a must-have for any creative classroom. Their vivid colors spark imagination, while the easy-to-clean formula ensures that accidental marks on hands, desks, or clothing don’t become permanent. These markers give young learners confidence to express themselves without worrying about cleanup, making art sessions stress-free for both students and teachers.
Drawing paper
Choose heavyweight paper that prevents tears and holds color well to support young artists in exploring different media. A sturdy surface ensures crayons, markers, and paints don’t easily bleed through or rip, allowing students to work freely without frustration. The right paper encourages layering, blending, and experimenting with textures, fostering a love for creative expression.
Erasers
Soft, smudge-free erasers encourage students to experiment without frustration by giving them the freedom to revise and refine their work. The ability to erase mistakes easily boosts confidence and supports a growth mindset, teaching children that art is about exploration, not perfection. A high-quality eraser helps maintain clean lines and ensures that students can focus on creativity rather than correcting messy smudges.
Colored pencils
Perfect for adding details and shading, colored pencils give young artists greater control and precision in their drawings. Their blendable nature allows for depth and dimension, helping students develop an understanding of shading and color mixing. Unlike markers, they provide a softer application, making them a great tool for both structured lessons and freeform creativity.
Step-by-step guide: How to draw a simple hand
With your supplies organized, you can introduce your early learners to the basics of hand drawing. Whether you're aiming for realistic, cartoonish, or stylized hands, start by breaking them down into their fundamental parts:
Palm – The foundation of the hand
Fingers – Varying in length and shape
Thumb – A key element for grip and expression
Wrist – Connecting the hand to the arm
Then, you can work with your students on tackling each, in a few easy steps.
Step 1: Start with basic shapes
Begin by sketching a simple square or rectangle for the palm. Add a wedge shape for the thumb’s base and five elongated ovals to represent the fingers.
Step 2: Define finger placement and proportions
Ensure the fingers are of varying lengths, with the middle finger typically being the longest, while the pinky finger being the shortest. Space them naturally, avoiding uniform alignment.
Step 3: Refine the shape and add knuckles
Round out the fingers and add small circles for the knuckles at each finger joint. Encourage students to create the knuckles in a way that doesn't align perfectly in a straight line.
Step 4: Outline the hand’s contours
Use smooth, flowing lines to shape the hand naturally. Adjust curves and connections to make it appear more realistic.
Step 5: Add details like fingernails and creases
Draw small rectangles for the fingernails and subtle creases where fingers bend. Pay attention to how nails follow the curve of the fingertips.
Step 6: Introduce shading and light source
Determine the direction of light and apply shading accordingly. Darken areas where shadows naturally fall, such as under fingers and around knuckles.
Step 7: Final refinements
Go over your drawing, refining any rough edges and adding any necessary texture. Lightly erase construction lines for a clean and polished look.
For additional guidance, The Virtual Instructor offers great videos and techniques on how to draw hands using simple shapes.
Other drawing activities to consider
Inspiring your young artists also starts with offering other fun and engaging drawing activities that build confidence and creativity. By introducing the following, more structured yet playful exercises, teachers can help their students to develop fine motor skills, hand-eye coordination, confidence, and artistic expression. Whether it’s breaking down complex images into simple shapes or using stories to spark imagination, these activities encourage exploration while reinforcing foundational drawing techniques. Below are creative ideas designed to make drawing lessons exciting and accessible for early learners.
Simple shapes to build confidence
Start with basic shapes to help children see how objects are formed. Give step-by-step instructions to turn circles, squares, and triangles into recognizable figures.
Draw a circle, then add triangles for ears to create a cat.
Use ovals and lines to build a simple fish.
Stack rectangles to draw a friendly robot.
Directed drawing activities
Directed drawing guides students through a step-by-step process to create a complete picture. This method builds confidence and improves listening skills.
Draw a smiling sun using a large circle with wavy or straight rays.
Teach how to create a tree by drawing a trunk and layering curved lines for foliage.
Show how to make a butterfly by drawing two large wings connected with a small oval body.
Story-based drawing prompts
Encourage students to visualize and illustrate scenes from their favorite books. Read a short story and ask children to draw a key moment.
Draw the main character’s home or a special object from the story.
Illustrate an exciting action scene, like a race or a magical event.
Create an alternate ending by drawing what they imagine could happen next.
Seasonal and holiday-themed hand drawing ideas
Make drawing lessons more engaging by connecting them to seasons and holidays.
Winter: Draw a snowman with three circles, stick arms, and a carrot nose.
Spring: Create a garden with flowers, bees, and butterflies.
Summer: Illustrate a beach scene with waves, palm trees, and a sun.
Fall: Draw a pumpkin patch with different-sized pumpkins and swirling vines.
Partner and group hand drawing activities
Collaboration fosters student teamwork and creativity.
Partner drawings – One student starts a drawing, then passes it to a partner to add details.
Classroom mural – Assign each child a section of a large sheet of paper to create a connected scene.
Folded surprise drawings – Students fold paper into three sections, drawing a different part of a creature without seeing what the previous artist added.
How to encourage creativity and beginner drawing confidence
Praise effort over perfection. Celebrate unique ideas and bold attempts. And consider these insights for encouraging your early learners to get creative.
Display your students’ artwork
Showcasing work boosts confidence and classroom pride.
Create a rotating art wall to feature new drawings each week.
Hang clipboards on the wall for easy display changes.
Design a digital gallery by taking photos and sharing them in a classroom newsletter.
Adapt your art lessons for different skill levels
Every child learns at their own pace. Offer adaptations to support all learners.
Provide tracing guides for students who need extra guidance.
Encourage advanced students to add backgrounds, shading, or extra details.
Let students choose their own subjects to foster personal expression.
FAQs about hand-drawing ideas for beginner student artists
Here are some of the most frequently asked hand-drawing questions, with answers and insights to help you inspire your students.
1. Why is drawing hands so difficult for beginners?
Hands are complex because they have many small joints, flexible movements, and intricate details. However, by breaking them down into simple shapes and practicing common poses, students can build confidence and improve their accuracy over time.
2. What are the easiest hand drawing techniques for beginners?
The best way to start is by using basic shapes, like circles for joints, rectangles for fingers, and an oval for the palm. This method helps students understand proportions and structure before adding details like shading and fingernails.
3. How can students make hand drawing more fun and less intimidating?
Encourage students to start with creative exercises, like tracing their hands, drawing cartoon-style hands, or sketching simple gestures. Fun challenges, like drawing hands holding everyday objects, can make learning feel more engaging and approachable.
4. What are the best practice exercises for improving hand drawings?
Daily gesture drawing and quick sketches of different hand poses help students capture natural movement and proportions. Other great exercises include copying hand references, using hand pose generators, and experimenting with shading techniques.
5. What tools and resources help students learn to draw hands?
A sketchbook, soft pencils (HB to 4B), and kneaded erasers are great for beginners, along with digital tools like Procreate or Krita for those exploring digital art. Online resources like hand pose reference websites and step-by-step tutorials can also provide valuable guidance and inspiration.
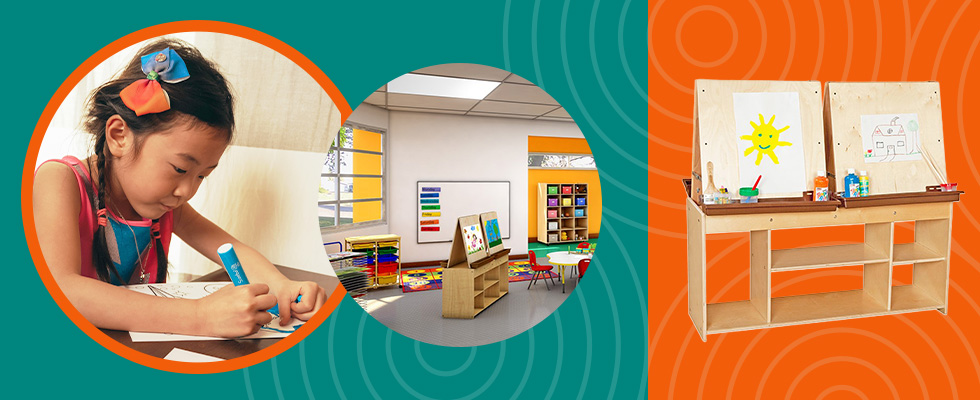
Bring art to your classrooms with the right furniture
Bring art to your classrooms with the right furniture. Art horses and bench easels provide sturdy, comfortable seating for young artists as they explore their creativity. Upgrade your space with versatile art easels, perfect for group projects or independent work. Showcase student masterpieces with art hanging display systems, turning your classroom into a rotating gallery of inspiration. The right setup and school furniture encourages engagement and make art lessons more immersive and enjoyable.
Find more DIY and teaching inspiration with School Outfitters
Need more fun and engaging ways to inspire your students? Come back to our blog for more insights and teaching inspiration. And you can always find the best products and classroom furniture essentials you need to create flexible and positive learning spaces. Shop around and get your free quote with us!